Filtering analysis

Introduction

Filtering lets you apply a strategic lens to your analysis. Instead of viewing results in aggregate, you can drill into specific segments of your audience and see how their preferences or behaviors differ. Filters work across all analysis areas, including question reports, exercises, and crosstabs, so you can maintain a consistent view of your target audience as you explore data from multiple angles.

Quick filters

Quick filters let you set simple parameters based on question responses and variable data without building complex logic.

To apply a quick filter:

  1. Navigate to Analysis section.
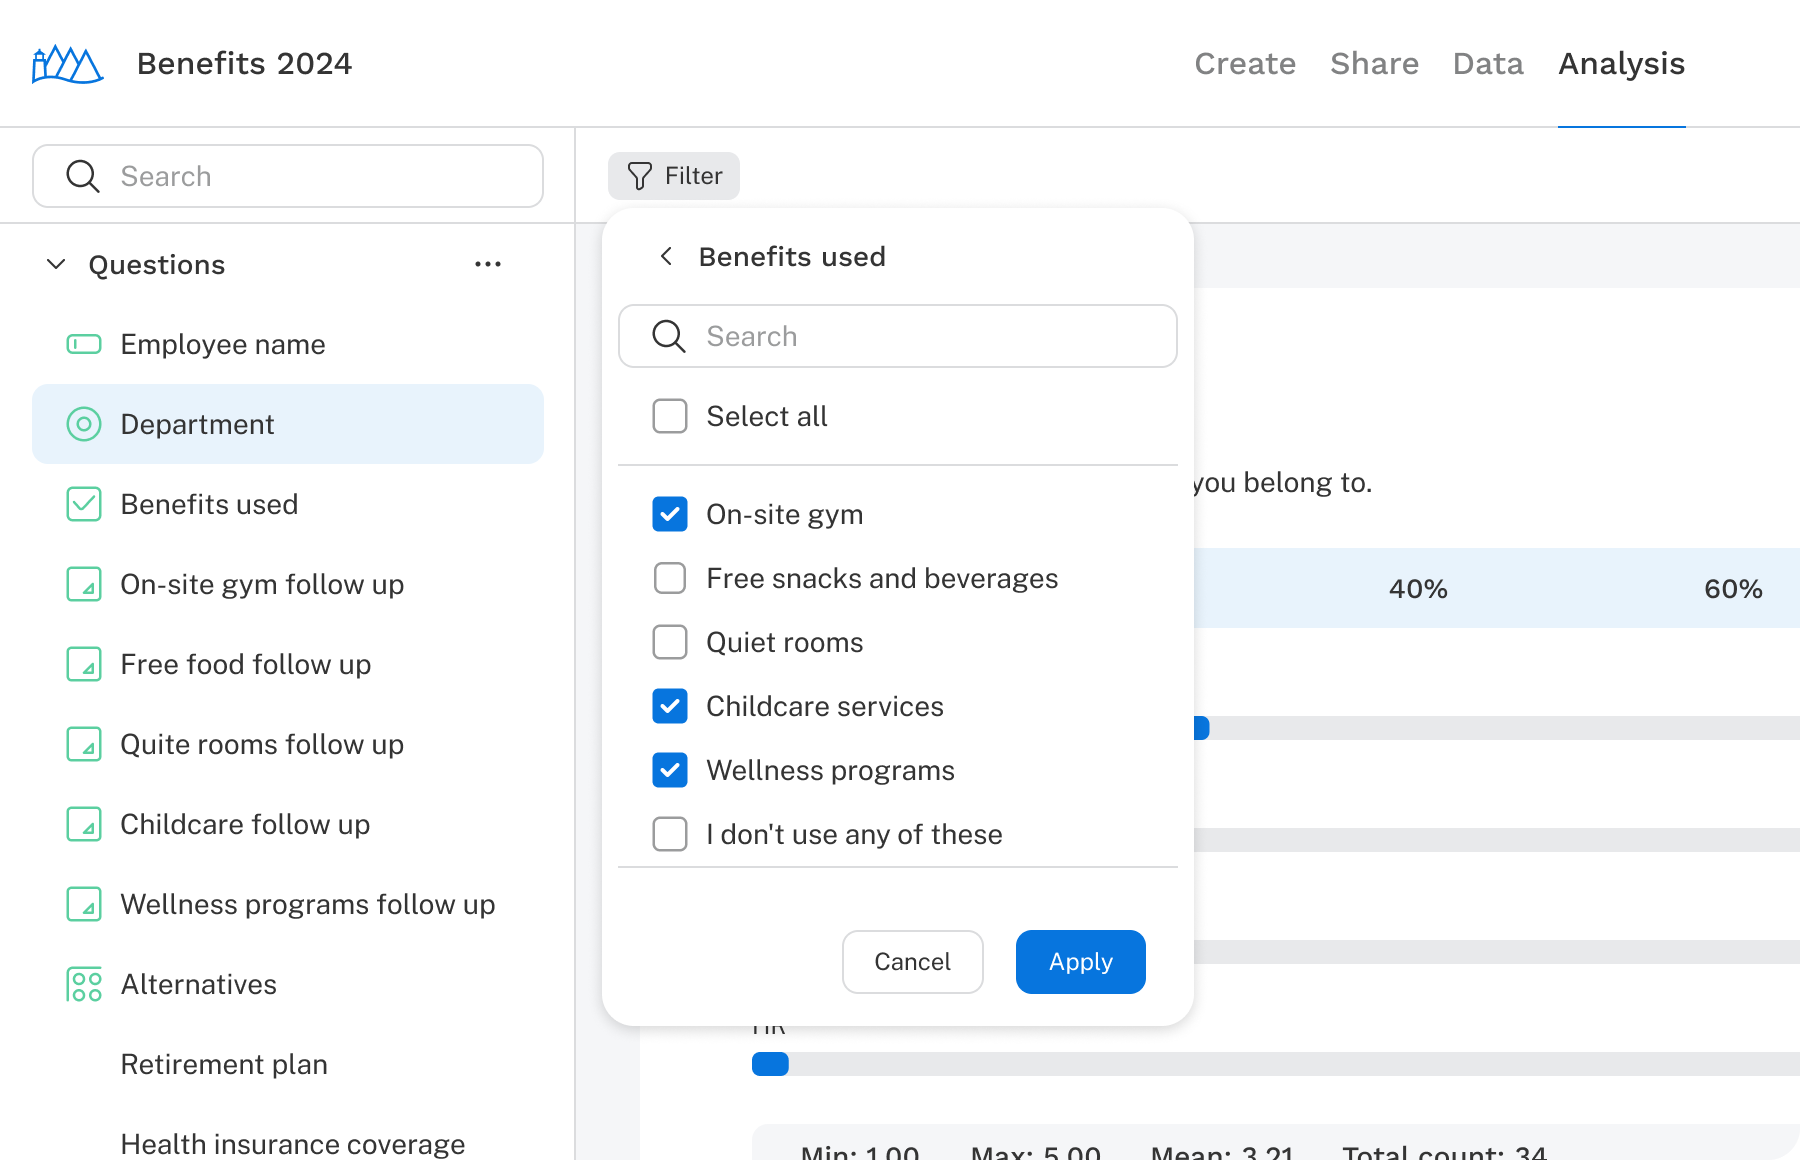
  2. Click Filter in the toolbar at the top of the reports panel. 
  3. Select the question or variable you want to filter on.
  4. Enter the response criteria and click Apply.

The final step varies by data type.

  • For categorical data such as single-select or multi-select questions, select from a list of checkboxes.
  • For numeric or text data, enter a value directly into an input field.
Quick Filtering menu in Discover

Managing quick filters

After applying a quick filter, the analysis refreshes and a filter chip appears in the toolbar. Multiple quick filters can be applied simultaneously. Remove individual filters by hovering over a chip and clicking X, or clear all at once with the Clear button.

To save a quick filter for repeated use, click Save at the end of the quick filters list. Saved filters appear under the Advanced filters section of the filter menu.

Advanced filters

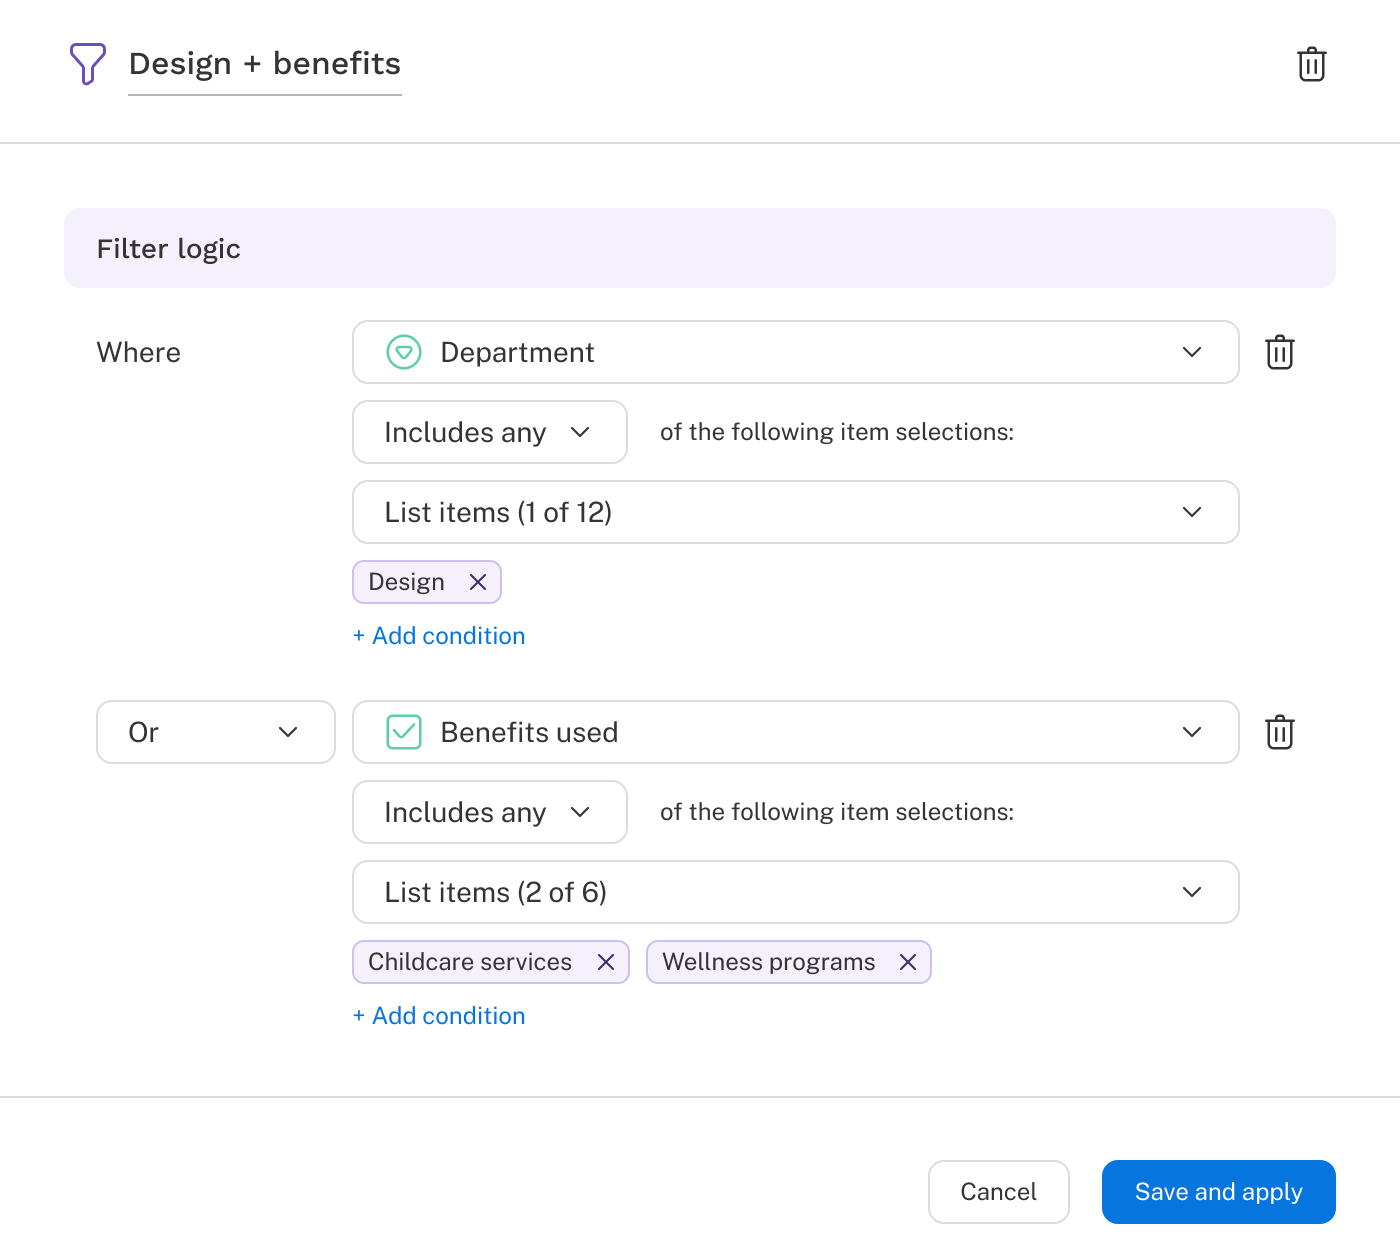
Advanced filters support complex logic built with the same dropdown interface used in skip logic, quotas, and display logic. They can be saved and reapplied at any time without recreating the conditions.

Note: Advanced filter logic has two limitations: open end questions only support the Is Any/Is not any and the Is answered/Is not answered operators, and analysis variables (variables derived from Segment Finder) are not supported.

To apply an advanced filter:

  1. Navigate to Analysis.
  2. Click Filter in the toolbar at the top of the reports panel. 
  3. Click +Advanced filter at the bottom of the variable menu.
  4. Name your filter and configure the logic using the dropdown interface.
  5. Click Save and apply.
New Advanced Filter UI in Discover

Note: only one advanced filter can be active at a time. To switch, clear the current filter by hovering over the chip and clicking X, then select a different filter from the menu.

Two limitations apply to advanced filter logic: open-end questions only support the Is any/Is not any and Is answered/Is not answered operators, and analysis variables derived from Segment finder are not supported.

See the Skip logic article for a detailed walkthrough of the logic builder.

Filtering special cases

Qualified responses

For a respondent to appear in a filtered report, they must have a valid response for the question being reported. Unanswered questions disqualify respondents from that question's report, even if they met the filter criteria.

For example, in a numeric question calculating an average, respondents who skipped the question are excluded from both the N count and the average calculation.

Not-equal-to numeric operators

When using the Is not equal to operator, respondents who provided no answer are included alongside those who didn't provide the specified value. In contrast, operators like Less than or Greater than assume a numeric response, so respondents who left the question blank are excluded.

Managing saved filters

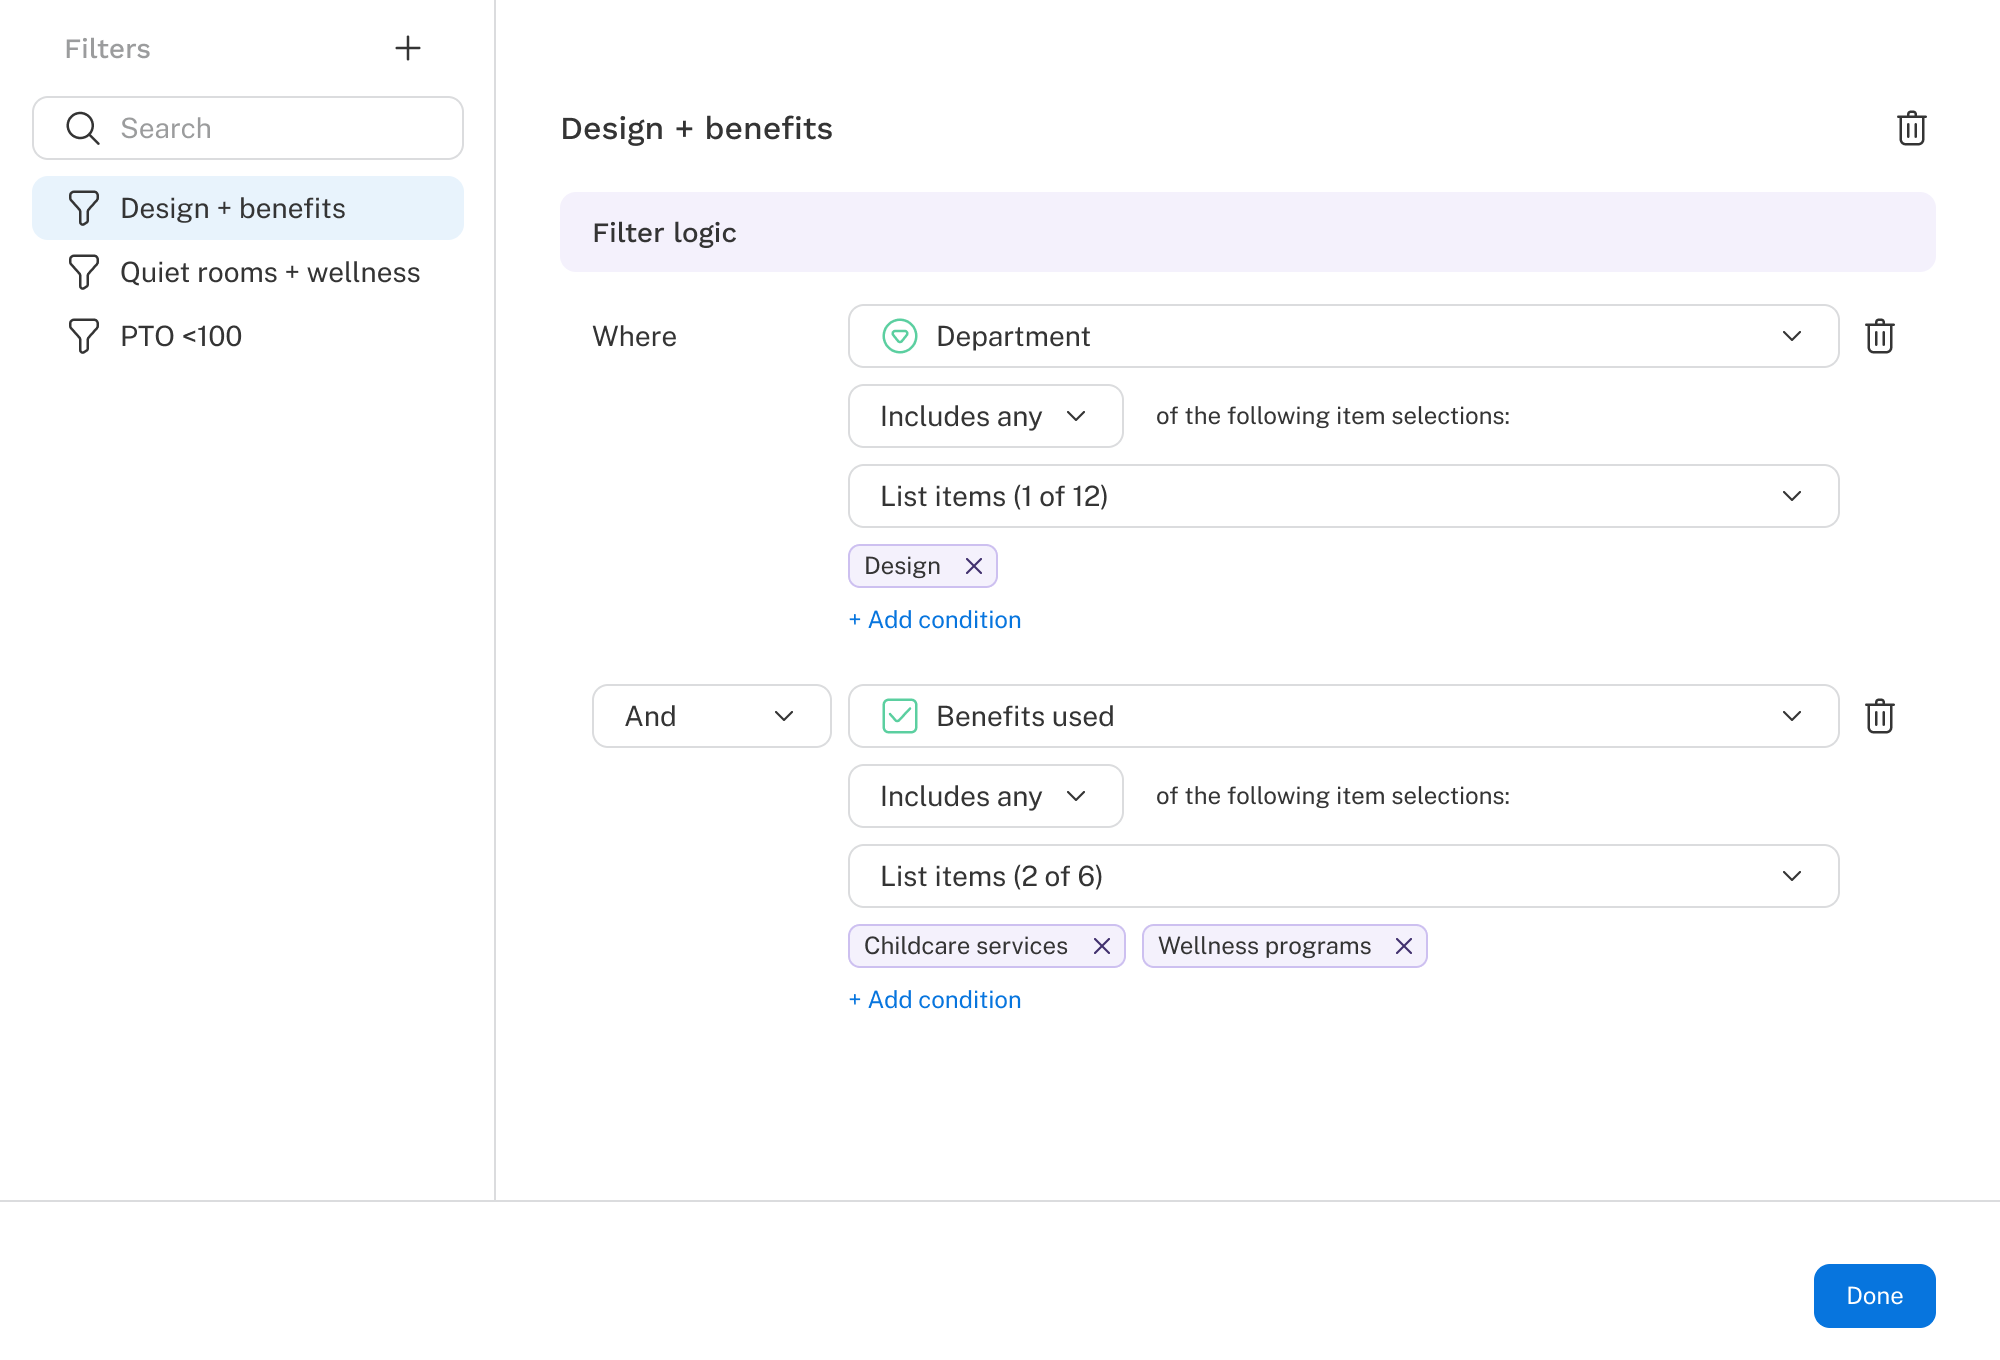
To manage saved advanced filters, click the manager icon in the top right of the filter menu. From there you can add, rename, edit, and delete filters.

Advanced Filter Manager UI in Discover